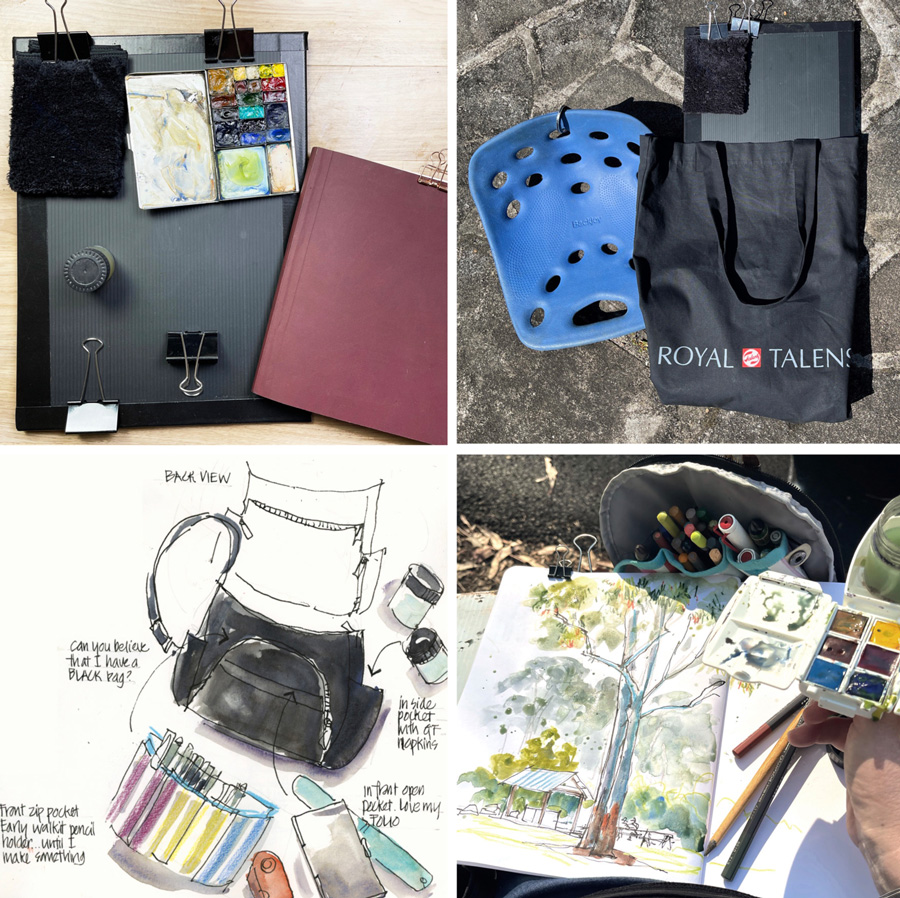
I mentioned last week that I have a new simpler support board and I promised to share the details. But really this story is more about a new sketching bag than anything else.
I’ve been thinking about re-designing my support board for a while now (something that will suit the various sketchbook sizes and formats) and I’ve also been trying to source some black coroplast/corflute. At the beginning of lockdown, I found some black coroplast online but the sheet size was smaller than I wanted and I ended up ordering the wrong thickness (3mm?). Disappointed, I put the sheets away. (Note: If you have an Australian online source please include it in the comment section of this article… and I’ll be very grateful!)
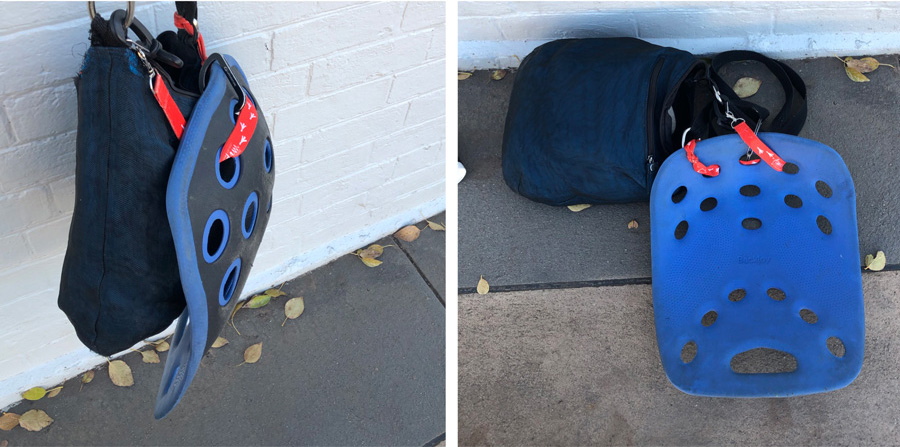
I normally have a secondary bag that contains my support board, a water bottle, a RestoPresto (you can see more about that here) and my Backjoy. This secondary bag varies – when I’m travelling it’s a bag from Cambodia (this photo is from my big Road Trip earlier this year) and my BackJoy is clipped to the outside, but when I’m at home it’s simply been a ‘canvas’ tote bag – such as one from the Palladian Museum in Vicenza.
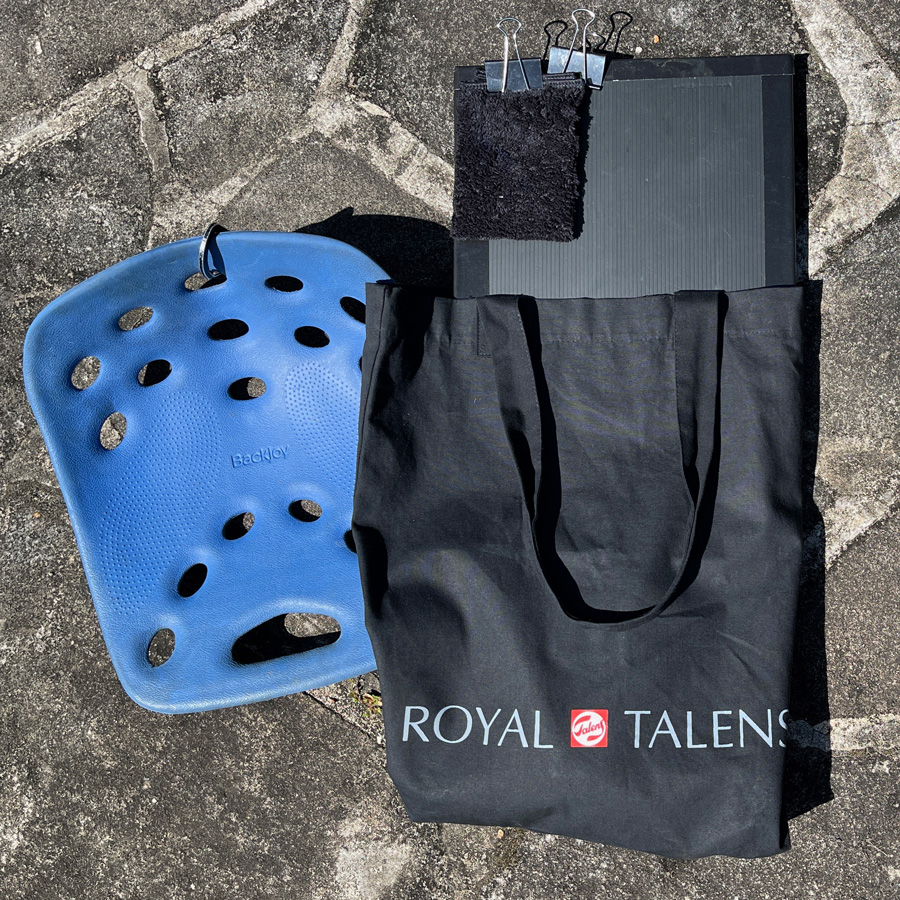
That particular bag (which I was naturally fairly attached to) was starting to wear out so I went digging in my sketching supplies for an alternative. I found a wonderful bag from Royal Talens that I was given during the Amsterdam Urban Sketchers Symposium. Not only is it made from good quality material but it is a little larger than the standard. This size is wonderful! (It’s 31cmW x 46cmH x 10cmD – 41cmW at top) I’m able to fit my backjoy inside… and I’m able to fit in a larger support board.
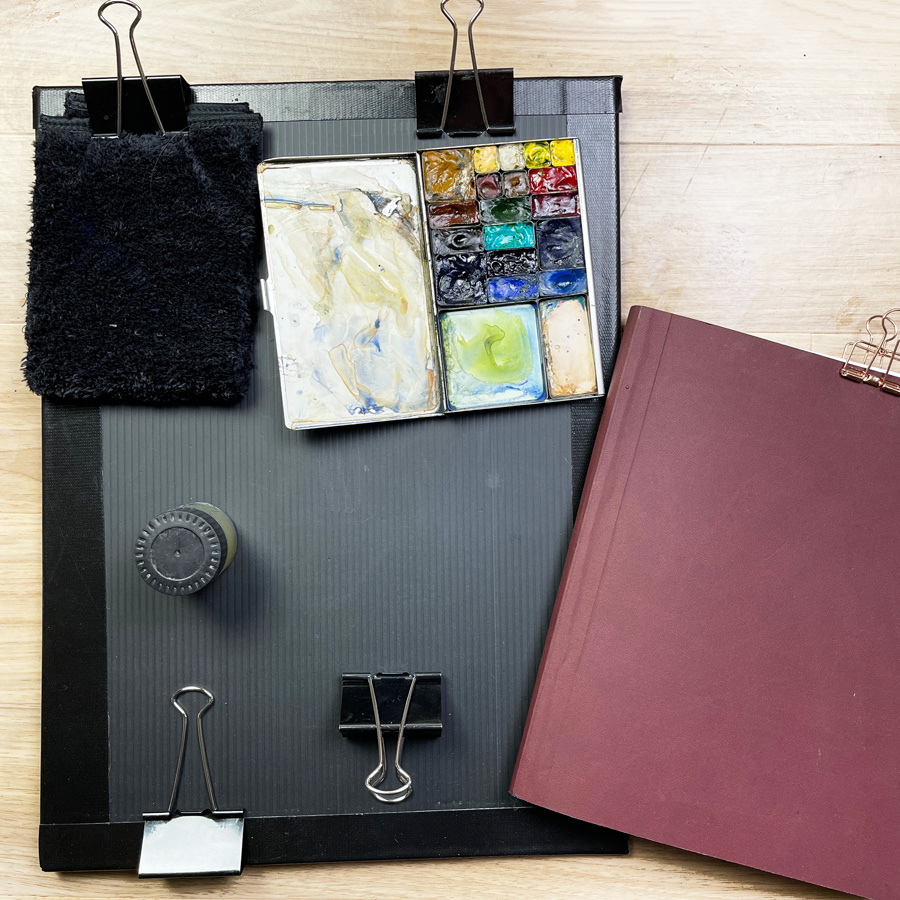
So my new support board is simply the two sheets of black coroplast that I ordered taped together. It’s great not having to unfold and clip together (as I had to with my last support board) and it’s wonderful to have a larger size board that provides greater support for my softcover sketchbooks. Note: Even though I think the Stablo portable easel is a great flexible solution (especially if you use smaller hardcover sketchbooks), I personally prefer something that supports the full height of my book and is less top-heavy. More about my thoughts on the Stablo here.
I’m not sure yet if this new board is the perfect size (30cmW x40cmH) but so far so good! I do need to test it with different-sized sketchbooks and my usual metal palette.
I also think that two thin sheets (ideally the sheets would have the grain running in different directions) is a stronger option than a single sheet.
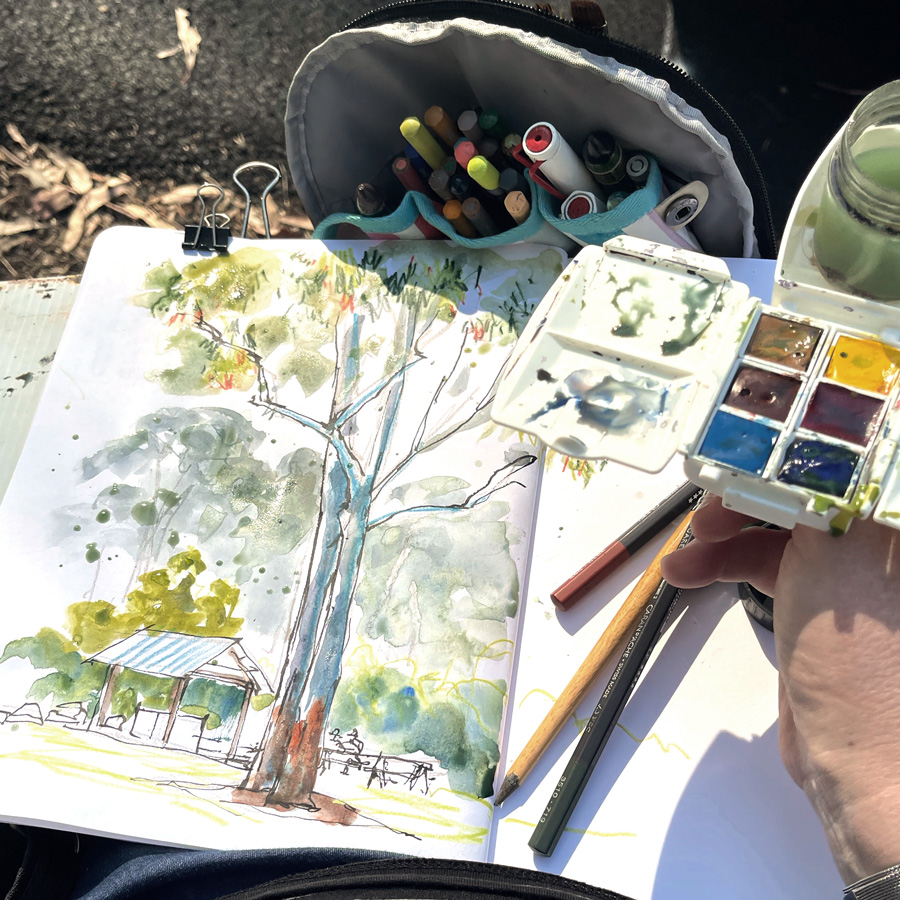
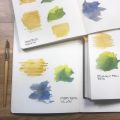
In addition to a new secondary bag and support board… I also have a new sketching bag. I got a few questions about it on Instagram after posting this photo.
My beloved Hedgren bags (blue and red) were wearing out and covered with stains, so it was time for a change.
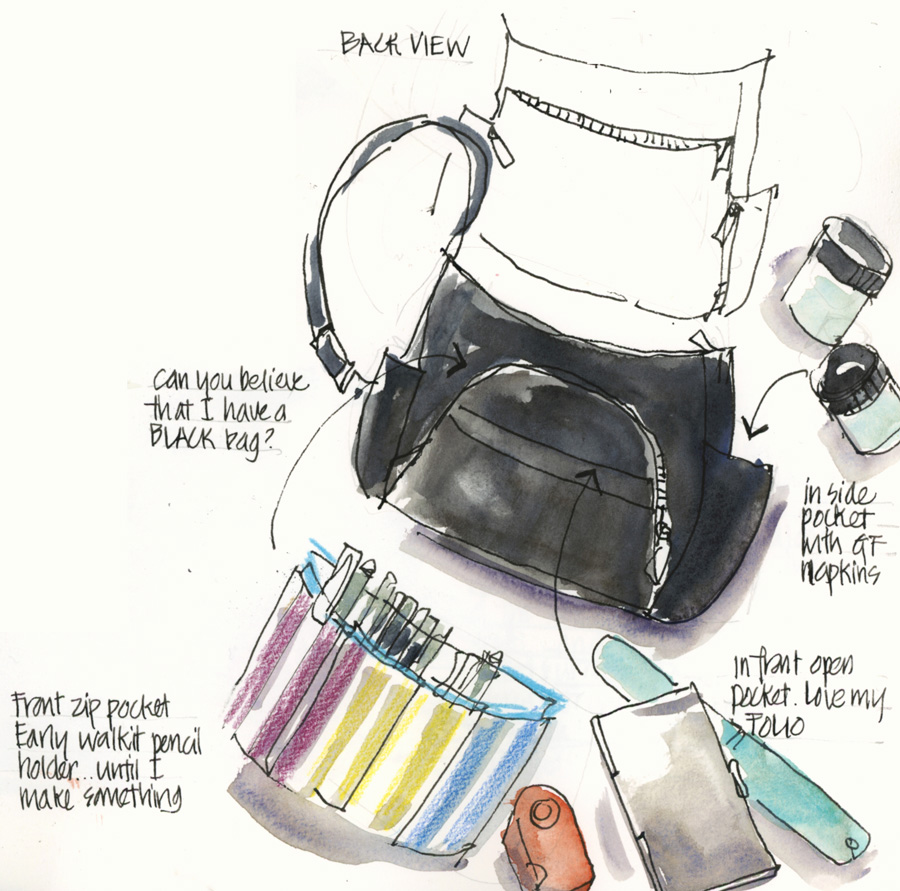
It’s a Travelon bag (Anti-Theft Crossbody Bucket bag) and in fact, I have already shared a sketch of it during my recent Staycation.
It’s working well!
The pencil holder that I’m using in the front pocket was from an early prototype of the Walkit sketching bag that Cecilia sent to me a few years ago. I do intend to sew my own eventually, but this is working just fine for now.
This bag works well for the Folio palette as it slips into the front open pocket – but wouldn’t work so well for my normal metal palette as it wouldn’t fit.
Note: On the particular day shown in the above photo I had left my Folio at home, so used my ’emergency’ Portable Painter Micro palette with the Daniel Smith Sketchers Kit (my selection of 6 colours).
So there you have it… an update on my bags and support board.
All up it’s a very simple solution that is working really well for me at the moment.


30 Comments
Good to hear about your new gear, Liz. It would be really helpful to see a video of you packing your bags, especially the cross body bag, to see how your kit fits in the bag and why you put things in certain places. Thanks for sharing this info.
Hi Rockie – your request is noted 🙂 though my use is not too different from what I shared in the intro lessons for my Watercolour On Location course – did you see them?
Just a note to tell you how much I enjoy your blog. I read it during breakfast. I love how you share all of your adventures. Your process in how you decide what works for you is also very useful. Thanks for sharing today!
Thanks Heather! I hope you are going well!
Nice bag. I need to keep the weight as light as possible. Of course, I want to carry everything I own. Do tell me what are GF Napkins? Something I should know?
Hi Jeanne – yes the base bag weight is always something I look at. GF = Goodfields my local cafe. They use nice thick recycled napkins. I’m now using a microfibre cloth.
How are you enjoying the anti theft properties of your bag? Has anyone tried to pickpocket form you while you are on a location?
Hi Marta – I haven’t taken my new secure bags into an area where there were pickpockets so I’ve never used the secure clips 🙂 I suppose you can find that info if you check out some Amazon reviews
Two pieces of thin Coroplast fastened together at right angles should be very sturdy. I found some tape that works VERY well on Coroplast–not easy to work with, but once put together it is permanent. Rather dear at retail price, but I bought some at a chain craft store with an excellent coupon: UGlu [Click] Coroplast (standard weight) is used for temporary signage, such as political signs for elections, or temporary sales, so is available after the event for free.
Oops! The UGlu link didn’t work the way I coded it. Here it is in cut-and-paste form:
http://www.protapes.com/products/uglu
I continue to develop my old instrument tool kit as an art field kit because it is so sturdy and adaptable (and I got it for free). But it limits the size of the sketching board. I cut along one tube on the back of the coroplast to make a hinge, used UGlu tape to secure (on one side of the cut) a strip of Coroplast to serve as a brace, and stiffen it further with a cllp-on dual cup intended for oil painting, which serves me for clean and used water. The larger sizes of standard Bulldog clips are hard for me to use (hint: some have stiffer springs than others), but I found a different type of clip that works pretty well: https://www.amazon.com/dp/B00IEG3H0W?psc=1&ref=ppx_yo2_dt_b_product_details
(hint: the little orange things sometimes pop out; when replacing note that they are not symmetrical. Put them in backwards and they will be more likely to pop out again.) I continue to use a Bulldog clip to close my watercolor sketch book after use, to help the pages flatten out. I make extensive use of Velcro fasteners. For pen and brush holders I use pocket clip eyeglass cases with the clips removed, fastened to the back of the board with Velcro so that the drawing instruments stick out in the plane of the board. I favor Marc Taro Holmes’ arrangement with the palette on the right side of the board, but with some sizes of sketchbook I will turn it 90 degrees so the palette is at the top, as Liz does. Refrigerator magnets with clips (https://www.amazon.com/dp/B071CTSNLT?psc=1&ref=ppx_yo2_dt_b_product_details) are effective with metal palettes, but I haven’t yet found an agreeable arrangement using them.
Thanks for sharing Alan
Those plastic clips with orange thingies (tech term) that always pop off? Hint: leave them off!! makes a great clip with smaller “footprint” so nicer to go over the edge of your watercolor palette and grip without taking up tons of space. Good for other situations too. The other day I actually took the orange things off one for a specific use! Learned this by accident looking at a photo of Michael Chesley Johnson’s and wondered what the heck kind of clip he had that worked like that! enlarged it and figured it out. I no longer toss mine!!
Brenda B
I’ve just found something at Officeworks called Foam Board – I haven’t seen it but here’s a link. Next time I go in I’ll have a look. https://www.officeworks.com.au/shop/officeworks/p/a1-foam-board-5mm-black-ljpcfba1bk
Thanks Carol – that looks like foamcore with paper on the outside. I would destroy that pretty quickly!
Officeworks also have what they call ‘signboard’ which is reasonably sturdy. I tape canvas paper to it without any issue.
Liz
I encase 1/4 inch white foamcore in 2 pieces of plexi or polystyrene, the sort that comes with cheap frames, and tape around the edges with 1 inch white artist tape. It is light weight, reasonably inexpensive, and can be used as a palette as well as support. I’ve made them in 9×12 and 11×14 inches, and have the materials to make a 12×16 which is as big as I would want to carry outdoors. They last for years.
Kristin USK NYC
Sorry for the inches instead of cm.
Thanks for sharing Kristin – that sounds like a great solution!
Kremer Pigments in Germany do a plein air kit:
https://www.kremer-pigmente.com/en/suche/?q=POCHADE+BOX&l=+
James Gurney uses a home made sketch book support on a tripod. He has a video on how to make it.
On coloured pencils Wendy Hollender, the botanic artist, has interesting and useful things to say. I bought the pencil sharpener she recommends and its works beautifully on coloured pencils.
John Burman, Hackney, Lodon
Hi John – thanks so much for sharing. I’ll definitely look up those links and names – know about James Gurney setup though 🙂
Hi Liz,
Now available at Officeworks (Melbourne), assuming in Sydney too.
Quill PP Signboard Black – A2 / 5mm @ $8.09 per sheet.
(500mm x 770mm x 5mm) Polypropylene / Coroplast
Product Code: 97800
Made in Australia
All the best and please stay safe.
Regards, Jenny
Nothing excites people more than talk of kit set up! Lol! It is always so helpful to read what actually works for people! I’m still searching for what May work for me, so certainly having dimensions like you give is fabulous! Black coroplast is a great idea, since the white I’ve used does get a bit icky. I keep considering making a cloth cover for mine, to help keep the melty hot factor reduced. I do live in a desert/hot climate.
I just bought your book! i love how you break the elements down into ” bite sized pieces”! So well written and easy to understand! Thank you for writing this!
Hi karen – so glad that you are enjoying my book!
Hey Liz – I was looking to put together a support board – was wondering if you could give more information on what you did for you new one and the dimension, how you constructed it.
Hi Teri – size as noted in the article 30cmW x40cmH and it’s just two sheets that size taped together with gaffer tape.
Liz, I have a support board like this that folds open. I got the heavier material at a hardware store, but also print shops that do yard signs for political campaigns use it is a good size. I cover the edges with gaffer tape instead of duct tape, and I place neodymium magnets under the tape, it will hold pallets or upright candy tins, and you can place brushes or pencils in the candy tins. They leak, so you can’t use them for water, but the magnets work well and you can configure them however you like…
https://youtu.be/bMy_kPiL4qY
A quick video of the magnets in action, maybe a 48 pan upside down is too much? 🙂
Adeline
Thanks for sharing Adeline
For my portable sketch set up, I have cut at Masonite clip board ( clip removed) to my desired size and added magnetic tape on two edges to hold my metal palette. I can sue the board vertically or horizontally . My water container slips easily over and edge of the Masonite. No extra clips needed and the set up is super easy.
Hi Karen, Sounds like you have it all sorted – great setup! thanks for sharing
NEWSLETTER
Subscribe for first notification of workshop + online classes and more.